Home / Racking and Shelving Insights / Enhancing Durable Shelving Systems Through Installation

If you want to maximise the space you have in your store, installing wall-mounted shelving is a great choice. It’s an elegant way of displaying products and provides an easy view of the items for you and your customers. Wall-mounted shelves are also a great storage solution when you’re adding more products to your store without cluttering the floor space.
Mounting shelves does not always need a professional hand, since they’re easy to install. You don’t need to set up several components, as the shelving is made up of ready-made shelves, brackets and channels.
You can easily add storage to your shop with our line of wall-mounted shelving. Here at Shelving Shop Group, our ready-made shelves are strong, durable and easy to install.
Here’s a quick how-to guide on installing our shelving systems.
Before installing a shelf, choose a location based on the available wall space on your store layout and the ease with which you want to access the items. Make sure that the shelf doesn’t block a door swing and is easily seen in the room. It helps if you use a cardboard cut-out of the size of the shelf to have an idea of how the wall will appear once it’s occupied by shelving.
Having the necessary tools for the project will save you time and frustration. Before you start installing the wall-mounted shelving, make sure that you have the following tools available:
Start the installation project by locating the studs on your wall so that you can anchor the shelf on them. Studs are typically placed 16 or 24 inches apart.
A way to find wall studs is by checking the wall receptacles, and removing its cover plate if needed. There’s always a stud on one side or another. Get down on your knees and check for nail heads on the baseboard moulding. Nail heads, especially if they are 16 inches apart, indicate that there are studs behind them.
Once you locate the studs, apply masking tape on the wall and mark the centres, so you won’t leave pencil marks on the wall and avoid messing up the wall paint at the same time.
Mark the location for the top screw hole of the first channel. While holding the channel in place, drill a small pilot hole.
Afterwards, drive an appropriately-sized screw into the hole. To help screws go in easier and faster, rub candle wax on the screws.
Make sure that the screw is secure but not tightened all the way. The channel should hang freely straight down and can be swivelled left and right.
Use a level to ensure that the channel is straight. Bore another screw pilot hole through the channel’s bottom screw hole and drive a screw through it. From there, install the screws in the channel’s other holes.
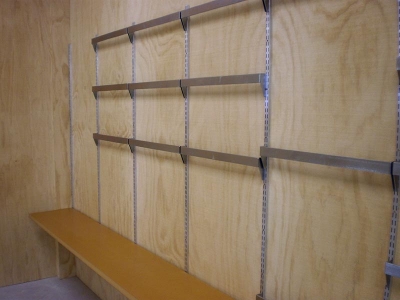
Find the proper position of the second channel. Place a a wall bracket on the channel hanging on the wall and install another bracket in the same slot of the second channel. If the shelf will be carrying heavy loads, you need to use three channels spaced evenly for adequate support.
Place the level across the two brackets and adjust the unsecured channel until it is aligned with the first one. Don’t forget to mark the location of the top screw hole.
Fasten the remaining brackets and slide the shelves onto them. Drill a hole through the front of the bracket at the mounting hole about halfway through. Finally, drive a flathead wood screw through the bracket and into the shelf.
Repeat this step to secure the remaining shelves.
Regular cleaning extends the life of the shelf and ensures that the entire display remains eye-catching to customers. Maintenance should be done at least once a week, although shelves installed in high-moisture areas need to be cleaned more frequently.
Maintaining shelves is easy, as it’s simply wiping the surface and sides with a cloth to prevent the build-up of dust. Afterwards, use a solution to thoroughly clean the shelf. The cleaning solution you’ll use depends on whether the shelf is made of wood, plastic, glass or metal. Make sure to also clean the items on display.
Shelving Shop Group provides robust and reliable shelving systems for your store display
We manufacture a range of shelving hardware and shopfitting accessories for different industries. Our products go through quality control and comply with the highest quality standards.
Our shop fittings from RMS are tailored to New Zealand conditions, allowing you to display your items while keeping them organised and protected.
You can trust us to cater to your shelving requirements. Contact us today.